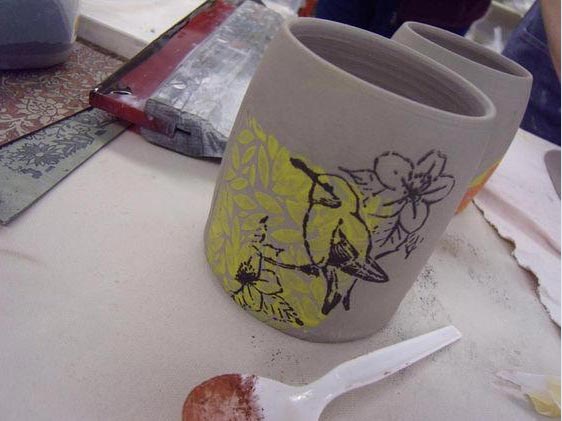
 I love to gift my hand-painted pottery to friends and family for special occasions. Because of that, I really like my pottery pieces to look professional even though they are hand-made. Not like they were bought in a store, but at least as good as something I would buy at an art fair. So when I paint something like flowers on a piece of pottery, I don’t want it to look like a five-year-old’s version of a flower, which quite frankly is what happens if I free-draw it. That’s where this awesome image transfer comes in handy. It’s a technique that must be done on soft wet clay, so it will take several trips to the studio to finish the piece, but it is so worth the time!
You can do this first part at home, before you come into the studio. First, go to your computer and find an image you would like to transfer. It could be a photo of flowers or perhaps your child. Maybe you want to create the image using several different photos using a program such as Adobe Photoshop. The next part is key, print your image using an inexpensive inkjet printer that uses water based ink (most of them do). No expensive printer, ink or paper needed, in fact the cheap stuff works the best. Note: Xerox copies and laser prints will not work as the type of ink used in those types of machines is not water transferrable.
Next, come into the studio with your printed image and let us know you want to work with wet clay. You can use the image on a tile, or create a plate on the potter’s wheel, the most important point being that the image transfer is easiest with wet clay, since it’s the water content in the clay helps the transfer process. It can be done on leather hard clay and even bisqueware, but with the diminished water content of the drier clay you’ll need to add more water to make the transfer work successfully.
Using the freshly rolled slap of wet clay, lay the print down face down so that the printed surface comes into direct contact with the wet clay. Soft slabs of clay have a high moisture content, so no additional water is usually needed. Lay the print down and then lightly run your hands over it to remove any air pockets, but be sure not to move the paper or it will smudge the image. Allow the print to remain in contact with the clay for 60-seconds until the ink bleeds onto the clay surface. Peel back a corner to see if the ink has transferred. If not, let it sit a few seconds more.
Let the wet clay dry to the leather-hard stage. Then you can easily carve into the piece using a pencil or sharp tool (you could even use the back end of a thin paint brush or a sgrafitto tool). After carving, use a damp sponge to wipe the surface off and remove the ink so you can get a good view of the image. Next we will bisque fire your piece and you can come back to glaze it. The carved image is a lot like a contour drawing in a coloring book, so applying glaze to it will be easy! We look forward to seeing you at The Bent Brush!
