We do not take reservations, seating is first come first serve
If you’ve got the creative urge, then we have a great outlet for you!Pottery Painting / Ceramics
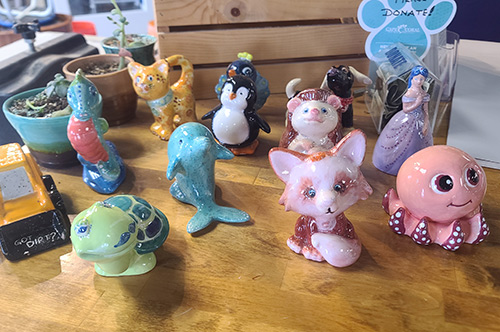
Come in and create with us, we have everything you need to create a beautiful piece of pottery you can use or give as a gift. Whether it’s a vase, a plate, a figurine or a serving platter, we have hundreds of beautiful or whimsical shapes to choose from. We can also show you all kinds of cool easy techniques to play with from stencils and stamps, to silk screens and bubbles.
We have two lines of glazes that are dinnerware safe, and some that are decorative only. Hand-wash your piece as you would any fine hand-painted piece of pottery. We recommend that you do not place your pottery in dishwashers and microwaves.
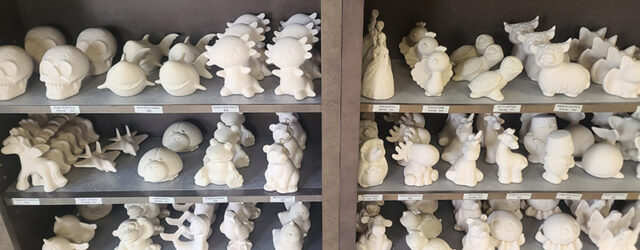
STEP 1
Pick your pottery from hundreds of unfinished bisque pieces on our shelves.
STEP 2
Plan your design, and select your colors from dozens of super shades! Need ideas? We’re full of ‘em! Browse our “Inspiration Station” for stamps, stencils, sponges, design books, and samples galore to get your inner Van Gogh “Van-Going”!
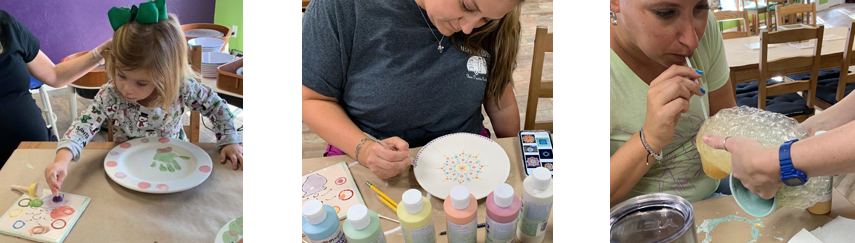
STEP 3
Paint your heart out! Drop your inhibitions, color outside the lines, finger paint, splash, splatter, experiment, and just plain “Go For It!”
Then, Let Us Do The Rest!
We’ll glaze and fire your creation to a bright, shiny gloss … and you’ll pick-up a fully-functional, dinnerware safe, one-of-a-kind, “Wow, that was fun!” MASTERPIECE !!!
Your Guide to Pottery Painting in Cape Coral
How much does it cost to paint pottery at The Bent Brush?
Our pricing is all-inclusive for your initial visit! The price marked on each pottery piece includes your paints, supplies, and professional kiln firing. We don't charge hourly studio fees for your first session, making it a transparent and affordable creative activity for families and artists in Southwest Florida.
What happens if I don't finish my pottery in one session?
If you need more time to perfect your masterpiece, you are welcome to come back! While your initial visit is fee-free, a small studio fee applies only if you return for a second session to complete the same project. This fee covers the additional table time, paints, and studio resources used.
Do I need to make a reservation for pottery painting?
No reservations are required for individuals or small groups! We welcome walk-ins at our South Cape Coral studio on SE 47th Terrace. Seating is first-come, first-served, so feel free to drop in whenever inspiration strikes. For groups of six or more, we do recommend calling ahead to ensure availability.
How long does it take for my pottery to be fired and ready?
Once you finish painting, we glaze and fire your piece in our professional kilns. The process takes about seven days. We don't call or text, we will tell you your pickup date at checkout. If you’re a tourist visiting Lee County, please plan accordingly to ensure you can collect your art!
Are the pottery glazes safe for kids and for eating off of?
We have several options that are safe for kids and dinnerware safe. They are perfect for children to use and wash out of clothes easily. After being fired in our kiln, your mugs, plates, and bowls are completely safe for everyday use in your kitchen. Functional pieces are not recommended for the oven, microwave or dishwasher.
I’m not artistic—can I still make something that looks good?
Definitely! We specialize in helping "non-artists" create beautiful work. Our studio features an "Inspiration Station" filled with stencils, silk screens, stamps, and samples. Our friendly staff is always on hand to show you simple techniques that produce professional-looking results regardless of your previous experience or skill level.
Can I take my pottery home the same day?
Because your pottery requires professional kiln firing to become durable and dinnerware safe, it must stay with us for seven days.
Is The Bent Brush a good place for a kid's birthday party?
Yes, we are a top-rated budget-friendly destination for birthday parties in Cape Coral! We offer a dedicated space for celebrations where kids can choose their own figurines to paint.
Stencils Make You Look Like A Professional!
So many times, people come into our studio and the first thing they say is, “My friend suggested we come and do this together, and while I’m excited about it, I’m not really an artist type. I can’t even draw a straight line!” At The Bent Brush, we never let that hold back our creativity! We understand that you may not have a lot of experience with this, but you still want to create something that will make you proud to either display it in your home or give it as a gift. The best part is, we have plenty of great techniques we can teach you that will be easy and have your pottery look professionally painted!
One of the easiest techniques that you can use is stenciling. We are excited that we have a paper cutting device in the studio that takes just about any image and creates a stencil out of it! I have often used this to make truly beautiful designs!
Stenciling is a great decorative technique for pottery, and it is often used in the professional studios as a way to ensure consistency in design when creating an entire set of dishes etc. A traditional method for applying stencils is to cut or tear paper shapes, adhere them to the bisque piece, and then apply glaze. Let’s go through it step by step though.
First you want to choose your stencil design. We use adhesive backed paper to print the design, so once you choose the design you can start to look at where you want it positioned on your pottery piece.
Next peel off the backing and position the design on your piece. You can now look at the many glazes we have in the studio and choose some to use on your pottery. Once you’ve chosen that, you can apply it with a paint brush or one of the sponge brushes we have. Load your brush or sponge with color (make sure it’s not gloppy, especially if your stencil is highly detailed), to remove a little of the glaze, bounce the brush or sponge on a piece of paper towel. Then using a light touch, dab the color on top of the stencil so that it goes through the openings in the stencil.
If you want the non-stenciled part of your pottery to be a different color, you can now paint the rest of the piece. Be sure not to paint toward the stencil since sometimes the color will end up getting under the edges, which will ruin the design. Brush the paint brush outward from the stencil instead.
Let your color dry before removing the stencil. At this point, you can decide whether the design is complete or whether to overlay this initial stenciling with another layer for added dimension or to outline portions of the shapes with another glaze color using decorative brush strokes.
Once the piece is dry, you can give it to us to put into the kiln. And that’s it! An easy way to end up with a gorgeous hand-crafted piece of pottery for your home or to give as a gift!
Quick Links
Subscribe
If you wish to receive our latest news in your email box, just subscribe to our newsletter. We won’t spam you, we promise!
The Bent Brush
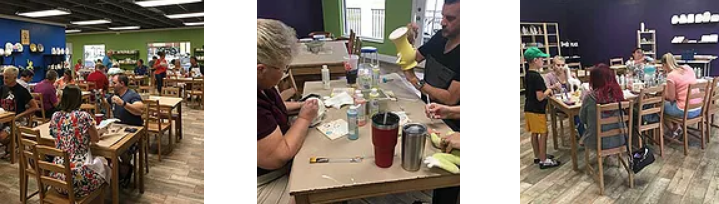
We offer open studio hours, (so you can just walk in), classes and workshops, and even studio rental for parties and events. We are your community hub for awesome arts and crafts in Southwest Florida! So come visit us today, or call us to book your next party or event!

Quick Links
Subscribe
If you wish to receive our latest news in your email box, just subscribe to our newsletter. We won’t spam you, we promise!
The Bent Brush
We offer open studio hours, (so you can just walk in), classes and workshops, and even studio rental for parties and events. We are your community hub for awesome arts and crafts in Southwest Florida! So come visit us today, or call us to book your next party or event!
Copyright © 2026 The Bent Brush. All rights reserved. Website by Visitivity Inc.